
The lost draft has been found! I was recently revamping how I backup my data and randomly ran across a text file in a weird place. It was the draft of part two of my series on migrating from Wordpress to Jekyll!
The first post in this series talked about backing up the old Wordpress site, exporting the site data for Jekyll, installing Jekyll and choosing a theme, putting together the new site, and hosting the content on Netlify. This post talks about cleaning up the exported content, improving my chosen Jekyll theme, porting my blog’s comments to the new site, and getting email service set up.
Cleaning up the content
The Markdown files that I exported from Wordpress (see previous article for more) were very messy. I set about the time-consuming task of cleaning them up. Here are some of the problems I encountered.
Issues with images
The most problems by far were caused by images.
- In the exported content, many of my image references ended up pointing to URLs at Wordpress’s CDN, for example
src="https://i2.wp.com/www.benjaminrose.com/..."I didn’t know if my images would persist there after shutting down my Wordpress site, and I didn’t want to rely on anything related to Wordpress anyway. I had to change all these URLs to point to my site’s local image directory instead. - Many image references used
srcsetattributes to load different images sizes responsively. My image downloads, described in the prior post, also included all these different images sizes. I removed thesrcsetattributes and kept just one size for each image (I backed up the other image sizes, just in case). I may look into ways to make my images more responsive at some point. - When I was using Wordpress, I used lots of hot links to images. Hot linking is kind of like stealing other people’s bandwidth, and the links can always break without you knowing. So I wanted to reduce the amount of hot linking I had. I spent a lot of time finding replacement images that were free so I could have them as part of my own site. In other cases I just removed the image completely.
- Images that I downloaded from my old site were in an annoying folder hierarchy based on dates. I hated it. Images were hard to find, and the source links were long and hard to read. As I already mentioned above, I ended up moving all my images into a single folder. I also renamed many of them with more descriptive names. This affected every single image reference on my site.
- In some cases, I had used image captions on my Wordpress site. There’s not a great way to handle captions in Markdown. I found some good information online and eventually settled on using Liquid to call an “include” template that contained HTML
figureandfigcaptionelements. These image references took major reworking to get into the new Liquid format.
All these issues meant that I eventually changed every image reference on my entire site, not to mention resizing and renaming many images and sourcing a bunch of completely new ones. This was a huge time sink. It was definitely the hardest part about this conversion process.
If your site uses lots of images, you’d best give a hard think to how you’re going to handle them. Perhaps there are ways to clean up the image references beforehand to avoid some of the pain I went through. See below for some specific notes on how I transformed all my image references.
Other issues
- My blog posts and pages were absolutely riddled with HTML. In a way, that’s not really a problem since HTML is considered a native part of the Markdown format and is a perfectly acceptable way to represent content when using Jekyll. All of the HTML seemed to function fine. But the source content was super ugly and difficult to parse for the human eye. I wanted to use regular Markdown as much as possible and make my content easy to comprehend in its native format.
- The Wordpress exporter put a front matter item for related posts in every blog post file. I’m not sure if this was because I left my Wordpress plugin for related posts active when I did the export, or if the plugin had done something to my Wordpress database or site content that the exporter seized on and decided to include. The front matter item the exporter created was super ugly, and I decided to attempt handling related posts another way (eventually). There were also some other random-seeming front matter elements, probably from some Wordpress plugin or another. So I pruned out all those extraneous front matter elements.
- Netlify offers free security certificates, and I wanted to take advantage of that. But the first time I built my site on Netlify, I got a warning about mixed insecure content. I found out that I had embedded many Youtube videos using the
httpprotocol. So I had to change all those tohttps. There was some other insecure content—I think it was some image hot links. Dealing with that was frustrating and time consuming, but I’m glad I have that security certificate. I always suspected that not having a security certificate was causing me to lose traffic. - One thing I liked about Wordpress is that it automatically used curly quotes. But this caused the export to use HTML entities for every quotation mark and apostrophe. I don’t like how this looks in the source, and I didn’t want to have to type ridiculous HTML entities every time I need an apostrophe. So I replaced all the HTML entities with dumb quotes. Thankfully, I discovered that my new site still ends up with curly quotes! At some point I figured out how, but I can’t remember now. Probably some CSS magic.
There were probably other issues that I’m not remembering now. Two months is a long time to remember such details. Since I lost this draft for several months after that, there’s no way I’ll remember any additional problems, if there were any.
Fixing the issues
I was able to fix a lot of these issues relatively fast by using multi-file search-and-replace with grep. I use BBEdit as my main text editor. Thankfully I’ve had some exposure to regular expressions in the past, and I’m a fairly quick study. If you don’t have any experience with regular expressions, now might be a good time to learn, otherwise you might have to do a ton of manual work.
Regular expressions/grep can be tricky, though. I actually had to start over from scratch one time, because I messed up my files so badly with a malformed regular expression. When you’re doing a multi-file search-and-replace, there’s no undo! I learned to make most changes one file at a time, even though it took longer, just to be safe.
Improving/tweaking the Jekyll theme
I liked the TeXt theme a lot, but I’m pretty particular and wanted to make some changes.
- First on my list was to change the font. I love a good font. One of my standbys has been Lato, but I’m kind of tired of it by now. I spent a couple days worth of my little free time just playing around with fonts. I eventually settled on Source Sans Pro. It’s very simple, spacious, and easy to read. It’s a Google font, so it’s easy to import in your CSS.
- I really wanted the header and footer to be static, so they would sit still when scrolling the page content. I want my visitors to always be aware of what site they are on (static header) and have access to the sharing buttons (static footer), no matter where they are in one of my blog posts or pages. I had to do a little research on how to do that. There were some unexpected consequences of my initial change that I kept discovering later on that needed to be addressed. It was a little tricky to figure out. I’m sure someone more experienced with CSS could have done it much faster.
- I made several other tweaks to the CSS, like increasing the indent for lists, changing the font weight for headings and links, adding styles for wrapping text around images, improving the table styles, etc.
- The TeXt theme came with a favicon for the theme. I’m not super particular about favicons, but I sure as heck didn’t want to use my theme’s favicon on my personal website. I found a free favicon-maker site out there and made a simple one with my initials in a color that more or less matched the color scheme I had chosen for my site.
- Initially I assumed I would be able to create some kind of top menu with drop-downs, like my old Wordpress site. However, my theme didn’t support that. But it did come with the ability to make custom sidebars. I ended up using that as navigation for my pages. It took a while to figure out. I’m pretty happy with the result, although it may be a little odd to get used to for visitors.
- The TeXt theme comes with tons of support for tags, but I mostly used categories in Wordpress. So I had more posts with category front matter than with tags. There were several options to deal with this. The fastest probably would have been to just switch all my category front matter to tags. But something in me rebelled at this idea—my categories are actual categories, not just tags! So I updated a few of the theme’s page templates to refer to categories instead of tags. This required me to figure out some things about Jekyll inheritance and Liquid syntax.
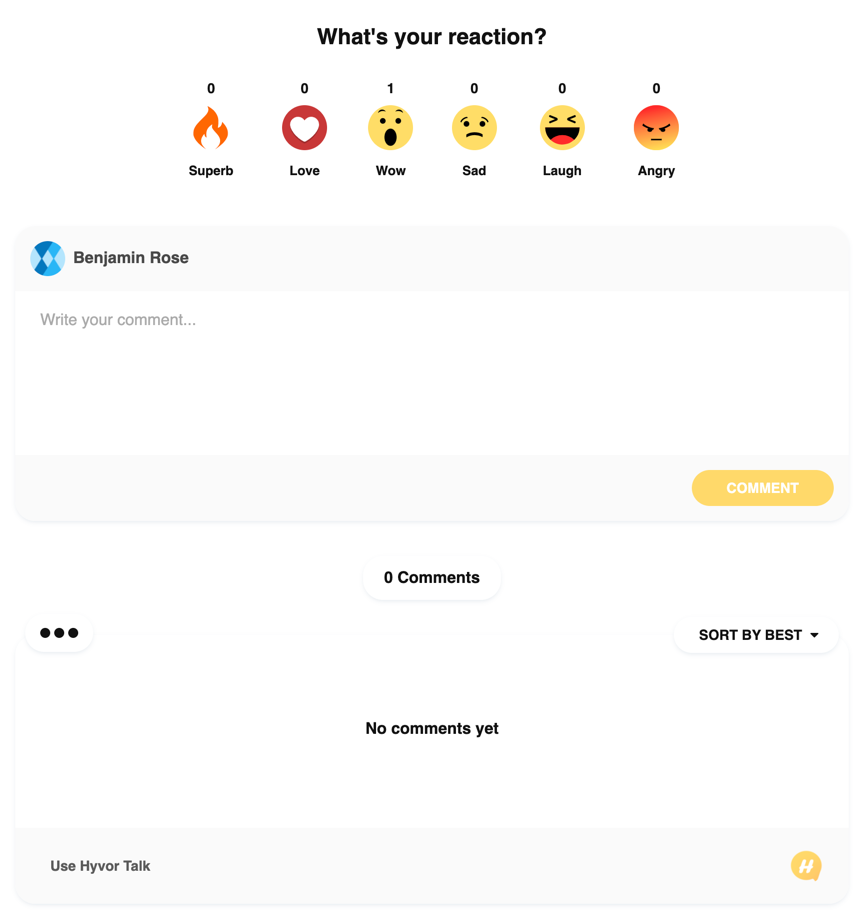
Preserving blog comments
I had quite a few comments on my old blog posts. In my mind, the ability to comment on blog posts is part of the entire point of blogging. I want visitors to engage with my material, not just read it and disappear. And I had lots of old comments with great insight. I didn’t want to lose all that conversation. But static sites are, well, static. It’s hard to have dynamic commenting on a static site.
There are various ways to have comments on a static site. Derek Kay does a great job of summarizing the various methods.
After researching the options on Kay’s list, I choose to use Hyvor as an integrated third-party commenting system. Hyvor has a generous free tier for their service, prioritizes data privacy (visitors can comment anonymously), and makes it easy to export your comments if you want to move to another system. They also have a way to import comments from Wordpress. These were all big wins for me. The main disadvantage is that if I ever get really popular, I’ll have to upgrade to the paid tier, which is pretty expensive at $40 a month. But I don’t think that will ever happen for my small blog.
Other options high up on my list were Disqus and CommentBox. I eliminated Disqus because their free tier shows ads by default. You can turn off the ads if you’re a small, private site. But I also read that Disqus has some pretty shifty ethics about data privacy. I eliminated CommentBox primarily because their free tier only allows 100 comments a month. I seldom get that many, but I did back in my heyday of blogging. I didn’t want to run into that limit.
So I created a free account on Hyvor. The Jekyll theme I chose (TeXt) has built-in support for some commenting platforms—Disqus, Valine, and Gitalk. It also provides a convenient place to add other third-party commenting platforms. Following the installation instructions on Hyvor’s site, I copied the installation code for Jekyll sites that they provide and pasted it into my theme’s spot for third-party commenting platforms.
Hyvor also has instructions for importing comments from Wordpress. I followed the instructions, but I ran into problems with the comments not appearing. After some troubleshooting, I discovered that I was following the wrong instructions, through no fault of my own. Whoever wrote Hyvor’s instructions for importing comments from Wordpress neglected to mention that the instructions assumed you are going to use Hyvor on the Wordpress platform and simply want to replace Wordpress’s built-in commenting system with Hyvor.
I’m not sure how I should have done it, but the result was that the comments that I imported were all associated with page IDs structured for Wordpress. Example ID:
1502:http://www.benjaminrose.com/?p=1502
Their default installation code for Jekyll wasn’t expecting the IDs to be structured that way. I solved this problem by editing the installation code to refer to these weird Wordpress IDs.
`<div id="hyvor-talk-view"></div>
`
In the process of figuring this out and doing all the troubleshooting, I ended up with a bunch of junk entries in Hyvor’s list of my site’s pages. Annoying, but not the end of the world. I did report this issue to Hyvor. I was really impressed with how quickly they responded. The link to the old instructions is currently gone, presumably under construction. Here is their article on migrating from Wordpress to Jekyll.
At the end of the day, all the comments from my old Wordpress site now appear on the appropriate posts on my new Jekyll-based blog. I’m really happy I was able to make it work.
It’s worth mentioning that the default styling of Hyvor’s commenting form doesn’t match my site. They have options to modify the styling of the forms, but I haven’t played with that yet. I also haven’t gotten any comments since I made the switch, so I have yet to see whether I will really like using Hyvor for comments.
My main complaint about Hyvor so far is that their commenting form is massive. It takes up almost the entire screen. I would much prefer a minimalist form.
Getting email service
One of the biggest disadvantages of switching to the free Netlify hosting service is that they don’t provide any email service. My old hosting service provided email addresses, and I’d used my primary email address for many years. I had also provided email addresses for my wife and some of the older kids as well. I didn’t want to go through the pain of starting up new email addresses and informing everybody under the sun of the change. We could never remember all the people and places where we had used our email addresses.
In the end I decided to use ImprovMX as a forwarding service, with Gmail as my actual email provider. This way, people could still send email to my old email address, and it would be forwarded to my Gmail address. I already had an old Gmail address handy, but I had to create new Gmail addresses for my wife and two of the kids.
I took a long time researching and learning about DNS and reading Netlify’s documentation before moving forward. I wanted to get this right, and I enjoyed learning about the arcane workings of email and DNS. In the end, the actual steps were pretty straightforward and easy.
The first thing I did was import all my email into Gmail. There are lots of explanations of this process on the web. Here’s one from howtogeek.com. Then I used Gmail’s “check email from other accounts” to make sure all new incoming mail would make it into Gmail (this whole process took me several days, mainly because of how little free time I have).
To use ImprovMX, I had to set up some DNS entries in Netlify’s DNS panel to forward email requests to ImprovMX’s email servers. Then in ImprovMX’s control panel, I told it which of my old domain’s email addresses should forward to which Gmail address.
I’ve been very pleased with ImprovMX so far. The only snafu so far has been a false alarm where they sent me a message saying my emails were not forwarding, even though they still were.
The final piece to this puzzle was setting up Gmail to send as my old email address. Gmail has instructions on how to do this. It was not difficult. I can even send email from my old address using Apple’s Mail program.
The end
That’s all I have to say. I think I had one more post in mind for this series, but as I’ve mentioned before, it’s not going to happen. Too much time has passed.
I do hope someone finds this post and gets some help from it. If that’s you, thanks so much for reading! Please leave a comment. :)